Thank you, Ann, for featuring this tutorial on A Girl in Paradise last Thursday!
Who doesn't need another bag? Especially one that could store lots of small pieces?
I happened to have made this game bag out of necessity - the box fell apart! And now I have a great little bag to keep all the pieces for this game in one spot. It was quick and easy. And I think it looks just right.
Let me walk you through the steps in case you want to give this easy-peasy bag a try.
Gather your supplies. This is what you need (the picture below does not cover everything):
1. Your game
2. Some sturdy fabric (I used this great Lotta Jansdotter linen - thanks Alison!)
3. Plastic for the window
4. Cotton webbing for handle
5. Rotary Cutter or Scissors (I ended up preferring my scissors)
6. Snaps
7. Button(s)
First, cut one long rectangular strip of fabric that will be wide enough and long enough to fold up at the bottom to be your bag. (Mine was 12" wide and about 48" long.)
Second, cut a square hole on the fabric where you'd like the window to be. I suggest using a pencil and ruler to center your window.
Below is how it should look. (My window was about 4x4".)
Next, snip a little bit into each corner so that you can fold back the fabric about a half inch on the inside.
Flip the fabric over and finger-press the sides open (you could also iron the edges flat).
Then, cut a square of plastic that is bigger than the hole you cut out of fabric (mine was about 6"x6"). Pin the plastic over the wrong side of the hole, catching the flaps with your pins. Then move to your sewing machine. FIRST, sew a line around the hole that is about 3/8" in from the edge, catching the flaps (this is the outer line). You should be able to remove most (if not all of) the pins after this step.
Then, flip over the fabric and sew another box around the window inside the previous box (this is the inner line). See below.
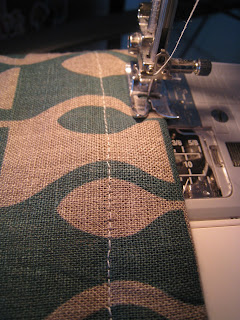
Next, turn the bag inside out with the wrong side together. Sew the sides of the bag. When you're done, this is how it should look. (I did an extra zig-zag stitch on my sides to make the bag sturdier.)
Fold down the bag to the desired length (I ended up cutting a few inches off the top before folding). You should fold once, then a second time to hide the raw edges. Press the fold.
Stitch the flap on the inside of the bag, about 1/4" from the bottom fold (see below).
Turn the bag right side out and stitch about 1/4" from the top.
Voila! You are almost done!
To add snaps, I bought a nifty little gadget that helps secure the snaps in place and allows me to pound really hard on the snaps to secure them. (Pound REALLY hard to make them stay!)
All right! Looking good!
Next, cut a piece of webbing to the length desired for a handle.
Sew a few times back and forth to secure the handle on both ends.
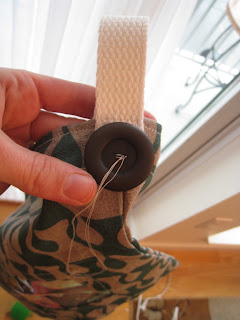
Finish by sewing a pretty button to the outside to hide any fraying from the webbing. I also sewed a button to the inside for the same reason.
While my son napped, my daughter played with his game and new game bag. Shhhh! Don't tell!
If you make this bag, please be sure to link up your pics in my FLICKR Group! Thanks!


No comments:
Post a Comment
Thank you for your comments! I enjoy reading them! :)
Note: Only a member of this blog may post a comment.