Showing posts with label knits. Show all posts

Mar 10, 2013

The Bear Paw Shirt

Woo-hoo! I love this shirt! And so does my son. It's probably my favorite version of all the flashback skinny tee's I've made so far. With several versions under my belt (for both my kids), I've figured out what fit I like best on my son. So I made a few adjustments to get what I wanted for this shirt (more on than below). But this shirt didn't come without a price: $96. Yep. I made an expensive mistake and my machine is now in the shop. (More on that too.)
At first, my kid was a little unsure. I mean, he was used to dinosaurs. Like this and this (and one other I haven't posted yet).
But then he got pretty happy with the shirt pretty fast.
In fact, he has already worn it three days straight. Success, if you ask me!
So anyway, I made some adjustments to Rae's fabulous pattern. What were they? Well, I widened the body of the 5T, expanded the shoulder seams, and left the arms almost rectangular (instead of tapered). My son also likes longer sleeves, so I gave them an extra couple inches. (One thing he loves to do is roll his sleeves up, so it's easier when they're loose.) A couple other things I did: I sewed on the cuffs BEFORE sewing up the sleeves. I think this looks so much better. The seems, of course, matches perfectly and there's no uncomfortable smooshing going on with sewing the cuff to the small wrist after the arm has been sewn. The last thing I did to create a better finish on this shirt was apply the collar differently. I just recently noticed that Rae put in another option for sewing on the collar which hides the seam. What you do is sew the raw edges of the collar and shirt to the INSIDE of the neckline, then flip the collar over to the right side, tuck the raw edge under (pin pin pin) and sew it down. It's just like doing the binding on a quilt. And it looks great!
I'm really very happy with it. EXCEPT - and I almost forgot to tell you this - I broke a needle sewing on the pockets AND it threw off the alignment of my machine. UGH! I looked all over for ideas on how to realign the needle with the throat plate and came up empty. So I called the shop where I bought the machine 4 years ago, and they said I needed to have it professionally re-aligned. The estimate came back with a $96 price-tag, which includes a cleaning, a tension adjustment, and bringing the machine back up to "factory standards." Turns out, I needed to change my knit-friendly needle with a heavy-duty one to sew together the fur, flannel, and knit. (Oops.) And it happened with only about 2" to go until I was done with the entire shirt. (So I hand-finished the pocket.) But geez... I feel pretty dumb not even thinking about changing my needle. I'm sure the nice lady at the shop was choking back laughter as I explained over the phone what had happened. (I wasn't about to tell her I had a blog!)
Anyway, that's that. Anyone interested in a tutorial on how to do bear paw pockets? If there's enough (any?) interest, I'll put a tutorial together (haven't done one of those in a while.). I'm sure my daughter would like a matching shirt. In the meantime, I'm doing some embroidery while the machine gets fixed. I'll show you some pics in a few days. :) 
I'm linking up with these parties!

Mar 5, 2013

The Pteranodon T-Shirt


Well, this shirt got a little carried away. I *think* it works, but seriously, I'm not sure. I kinda think it looks a little Trek-y with the collar (Spoc-ish with the green?). My husband assures me it doesn't. Still...I'm not sure.
It started with a simple idea -- a pteranodon. I found a nice silhouette online and proceeded to apply him the same way I did the allosaurus on this shirt. (But did you know that a pteranodon is not, actually, a dinosaur? I'm learning things all the time from my 5-year-old.) Then the clouds needed to be added. And then the embroidered FLY. Oh, and I couldn't forget the French knot eye on the non-dinosaur.
Then my son turns around. Is that a strip of fabric going down the back? And stripes on the side? What??
Here's the full disclosure: I cut my front and back pieces with the stretch going the wrong way. And didn't realize it until AFTER I did all the applique and embroidery (BIG GROAN). I needed to add those black strips for breathing room. (There are patches under his arms too.) I HAD to save the shirt...
 Lesson learned: I do not do my best work late at night. Kudos to all those sewists who are up till midnight (and beyond) working. I just can't do it. (Hanging head.)
 (Enough already, Mom)
I'm hoping this shirt will be worked into the rotation. I let my son pick out his school clothes and when he kept choosing the allosaurus shirt over store-bought shirts (which totally thrilled me) I figured I had to make him something else. Unlike my daughter, my son typically loves everything I make for him. I'm hoping this one is comfy enough with all the fixings. Tomorrow will be the test...(fingers crossed). I may or may not place it on the top of his shirt pile, for no reason at all...

Pattern: Rae's Flashback Skinny Tee
Fabric: the black is rib knit; white and yellow are Kona cotton; all from Joann's
Embroidery: backstitch on FLY using 4 red threads
I'm linking up with these parties!

Feb 25, 2013

Gymboree Knock-Off


You know, I look at these two pictures and part of me STILL wants that Gymboree top. I mean, I don't have an embroidery machine and that factory manufactured top looks so pulled together. But then I look at my cute little girl in the top her mama made her (as best she could, pulling ideas from a tiny picture online) and think, she's better off with this one. It's a better story.
 I had a good time putting this top together, improvising as I went. Once again, I started with Rae's basic Flashback Skinny Tee pattern (5T for my little one) and added a little poof in the sleeves, along with the tutu, and this embroidered bunny.
Can you see that I put ballet slippers on this bunny?? Adding the 3-D tutu and bow are the details I enjoy most. I talk about the really easy way to add a bow in this post from not too long ago, in case you're interested.
I also look at these pictures and think, they're not my best. I should've ironed that wonky collar. And I should've taken off my daughter's undershirt so there wouldn't be a goofy ridge on her chest, right above the bunny. But these are things I notice (...did you?).
My daughter loves her ballet class, hence my new obsession with shirts/tops/outfits depicting dancers. When I discovered that Gymboree had a line of "Glamour Bunny Ballerinas" back in the fall I was sorry I missed the boat!(amazing what eBay turns up)
My photo shoot with the little one was up and down. Her brother running up and down the hall was so much more exciting! And bribing her with Swedish Fish only went so far. When she was done, she was done.

Happy sewing, all!
Linking up with these parties.

Feb 19, 2013

PlayDay Dress Pattern Tester

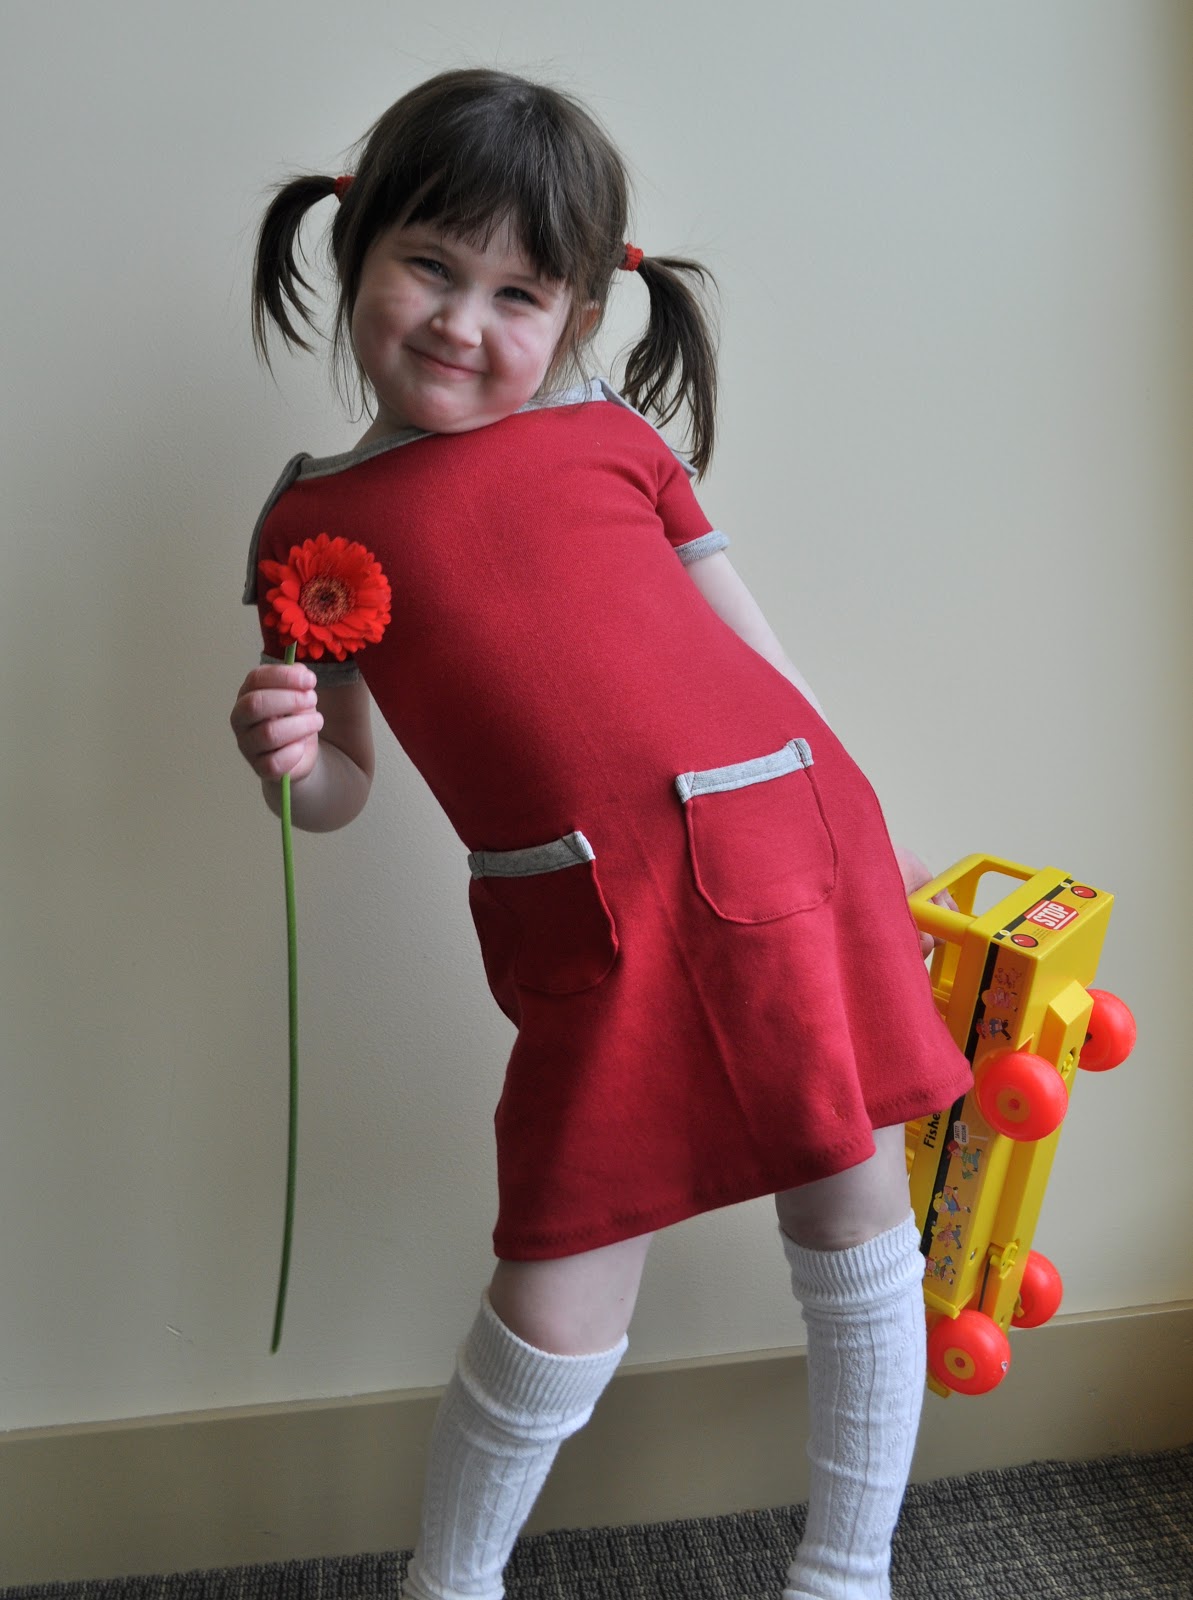
It's done! With my husband gone for five days and my daughter needing a trip to the ER over the weekend, I haven't had much sewing time lately. But I did squeeze in this adorable dress by Heidi & Finn because I was picked to be a pattern tester! Let me tell you, I was sooooo excited. And the PlayDay Dress pattern did not disappoint. It was written beautifully and professionally, and was very easy to follow.
 And the outcome? How cute is this dress? Seriously. I love it.
And I love those little button flaps at the shoulder. This was a new technique for me and it was fun learning something new. I think this detail really sets this dress apart from others.
 Oh, what a ham! My daughter turned on the charm during our photo shoot. I'm wondering where she gets that hip pose from?
 So if you're interested in sewing up a quick, adorable knit dress for your little one, head over to Heidi & Finn's shop and pick up a pattern. It's just been released today!

PS: I'm linking up with these parties!